A blog for cooking and crafts

Thursday 21 December 2017

The last cards of the year

Having managed to get everything posted to everyone by the skin of my teeth, I thought I would share the last couple of card batches I made.
I have been playing with a new set of hexagon dies:


The dies are from Sizzix (bought in the sale!) and I cut the blanks from an existing square blank, then cut a mat out of Crafters Companion patterned cardstock.  The snowflake image is by Sue Wilson and I stamped/embossed in silver.  The sentiment is so old I am not sure where it is from, this was also stamped/embossed but this time in lilac.  I am definitely going to make some more of these hexagon cards, they are great fun :-)

These vintage cards were actually done at the October ATDML retreat but I never got around to blogging them:


I made shmooshy distress ink backgrounds, then over-stamped with images from Stampin Up - frame, carollers and Father Christmas - and an old one from Creative Expressions.

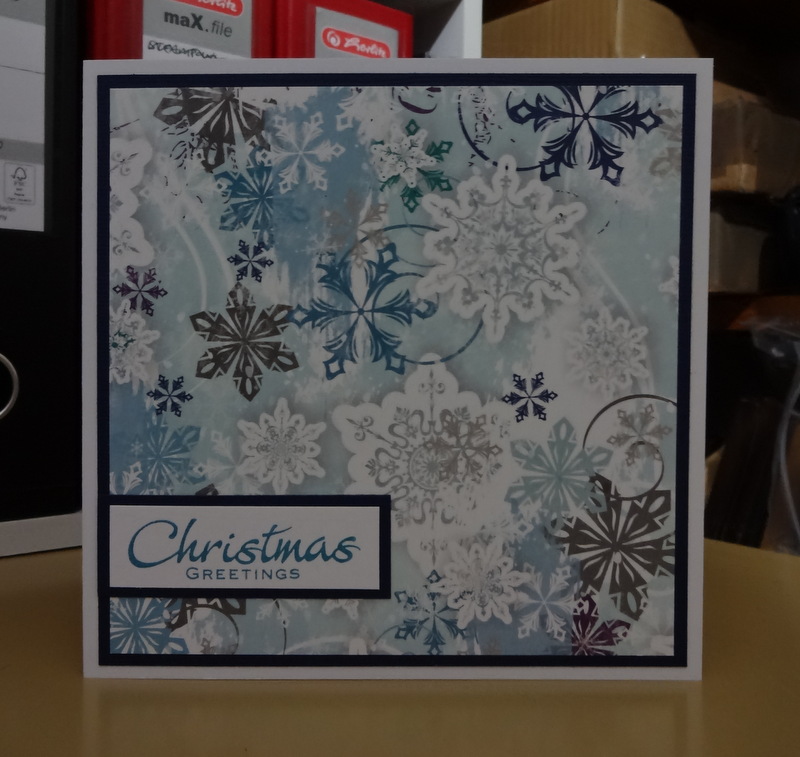
Wishing you all a Merry Christmas and  Happy New Year :-)

Wednesday 15 November 2017

UK Scrappers Christmas Countdown Day 15


Today I am taking part in the UKS Christmas Countdown :-)  Some lovely projects posted so far!


This gingerbread men screen card is not very complicated to make and looks very effective.  It can be customised to fit your own border punch, or done to standard measurements - this one is customised. A sheet of 12 x 12 will make two blanks. All measurements in inches :-)

Customised measurements and method:

  • Cut a 12 x 12 sheets of cardstock into two 6 x 12 strips
  • Punch along the top edge with your chosen border punch
  • Count the pattern repeats on the border
  • Work out the nearest number divisible by four - this punch made 34 repeats, so the number needed is 32
  • Cut off the extra repeats and score three times at equal distances along the card - so in this case that's every eight repeats
  • Use a bracket-type punch to make the 'legs' by using the top half only to punch at the base of the card, centrally in each section
  • Cut four panels of patterned paper to fit
  • Die cut letters and gingerbread men and assemble
Standard measurements and method:
  • Cut the strips to 11 x 6
  • Punch along the top
  • Score at 2.75, 5.5 and 8.25
  • Continue as above
The standard method is obviously quicker, it's just that I like my pattern repeats to line up with the score lines ..... LOL.
The paper is from Craft Creations, the letters are from Die-namics (stitched alpha), the gingerbread man is from Tonic and the punch is from Stampin' Up.


Sunday 12 November 2017

50th birthday card

I made this for a work colleague, we presented it yesterday so now I can share :-)


The blank card was cut on the Silhouette, I used this file from Craftsuprint.  It has the card base, a mat and the numbers, all can be cut from a sheet of A4 - I cut the base twice in purple and the mat and numbers in white.
I cut one base in half and embossed it with a folder - I could have just embossed half the main base, but a lot of people had to sign the inside, which would have been difficult on a debossed surface!  Then the embossed half-base was attached to the main one.
The numbers were also embossed and then inked with distress inks in purple, teal and pink.  I attached them to the white mat and then the whole topper to the card.
Then I was a bit stuck - part of the brief was butterflies, but I couldn't find a butterfly die which looked right, perched on the 50.  But whilst looking through the box, I came across the champagne glass and pearly trail, which were perfect.  They were die cut in Bazzill Diamond Bling and the small butterflies were punched to match.  A few pearls and it was done.
I am very pleased with this - she couldn't open all her cards at the party so I hope she is pleased too .... I'll find out tomorrow :-)

Wednesday 25 October 2017

Out of the Drawer: Grungy pink butterfly birthday card

Another stamp christened .......


I stamped, coloured and masked the Stampendous butterfly/music stamp, then used various splatty stamps over the mask.  The sentiment is from Stamping all Day.
A narrow black mat to finish it off ........ I am actually not too sure whether I like this one or not, maybe it'll grow on me :-)

Thursday 19 October 2017

Teal butterfly circle birthday card

I was having a play around with some unbranded dies, testing them on cardstock from the scraps box.  This teal butterfly circle looked so nice, I found papers to match and made this card :-)


The backing paper is Kaisercraft Lilac Whispers, I used a sheet from the 6.5" pad.  I was just going to put the die-cut on top of the paper, but decided it looks better on a white circle, which I cut using a Crealies die, the sentiments strip is the same make.  It's a little difficult to get a sense of scale from the photo, the card blank is 4".
Next time I use this die, I think I will cut an extra butterfly to add dimension, but I am very pleased with the way it looks when flat :-)

Tuesday 17 October 2017

Out of the Drawer: Vintage Christmas card

I have had this poinsettia stamp from Hero Arts for over a year, having bought it in a sale well before last Christmas.  It's actually been in my crop bag for most of that time, but I just haven't got around to inking it, until now!


I  made a smooshy distress ink background, then over-stamped the image and a sentiment (SU) in brown.  This was then matted onto a bronze-y cardstock.  I cut a square from Bazzill Swiss Dot Kraft, adhered to a kraft card blank, then added the topper.
I love this vintage look.  But next time I will try colouring the image, though I am not sure which bracts should be red and which green!!

Sunday 15 October 2017

Out of the Drawer - embossed pink birthday card

I have an large number of embossing folders - time to do something with them!
I made a lot of different embossed backgrounds and inked them up with various distress inks.  They were cut to fit, adhered to the card blank .... but then what?  I do always have trouble covering up backgrounds LOL.


So this is what I came up with.
I stamped the flower (SU) three times, coloured and punched out.  Then they were layered onto the card, the first flat to the background, the second with 1 mm foam tape and the third on 2 mm tape.  I die-cut the banner and stamped the sentiment onto it.  The original embossing folder was (I think) from Taylored Expressions.
It is a bit pink for me ..... but a perfect addition to The Box :-)

Friday 13 October 2017

Venice layout

Another layout done at the Merly retreat.  The kit was supposed to be used for a triple photo frame, but the papers fit a photo I had brought with me so well, I went with that instead and the frame awaits another day .... :-)


The Kaisercraft paper collection is Indigo Skies.  The title is cut with SU dies, I also used a KC harlequin die for some detail, it doesn't show very well in the photo.  The punched edge is a PATP set from Martha Stewart.  To finish I scattered a few pearls in blue and yellow to match the costumes in the photo.

Wednesday 11 October 2017

Patchwork bag

I am falling behind a bit on my three-posts-a-week goal.... I'm sure I can catch up two more this week....  LOL.
Something a little bit different today.  I like to cut out projects from craft magazines and store them in display folders 'to make later'.  Well, now I have actually made one!  A couple of months ago now, I forgot I hadn't blogged it.


The bag is made up of 19 x 3.5 squares and some 3.5" strips, some wadding and a lining.  It is quite small, meant for a lunch bag, I carry apples and bananas in it to work so they don't get bruised! The original project has an oilcloth lining but I just used some furnishing weight gingham fabric someone gave me years ago.  There are a few mistakes, but I love it.
Incidentally, I die-cut all the squares and strips, as I can't manually cut fabric straight to save my life!

Sunday 8 October 2017

Vienna layout

Another layout!  This one was done at the Merly Impressions retreat, back in July.  Chrissy's original design involves much more fussy cutting, but I find that hurts my hands so I simplified it :-)


The Wiener Riesenrad is the oldest ferris wheel in Europe and was restored to fully working condition a few years ago.  I had never been on one, it was an interesting experience and the views were amazing!
The papers are from Kaisercraft as is the circles die.  I cut the gears from a selection of my own dies and the letters are done with an SU die set.  For the mats under the photos I used a punch around the page set by Martha Stewart.


Wednesday 4 October 2017

Steampunk-ish layout

I can't remember the last time I shared a layout!  I made this at the April ATDML retreat, but never got around to blogging it.....


I used various papers from Prima, Studio Light, Kaisercraft .... the dies-cuts are some gears from (I think) Memory Box and part of a circle by Tonic.

Monday 2 October 2017

Birthday card: cherry tree on stencilled/stamped background

Although there is no official Blogtober this year, I am going to try and repeat my personal goal from last year - three (or more!) posts a week.
I started this card off with a stencilled circles background in purple.  Then I used a splatter stamp in green over some parts of the stencilling.  The cherry tree is from Lavinia Stamps and the sentiment is from Stampendous, both stamped in black over the background.


Nice simple card this one, quite quick to do and really effective.

Monday 25 September 2017

Buy it - Try it: Daisy & border birthday card

I used my new SU daisy stamp and punch set to start off this card, together with a Kaisercraft texture stamp and a sentiment banner.  But it was just a bit too CAS for me, I felt it needed something else.
Fast forward a couple of weeks and I had bought some new Kaisercraft dies at the Merly Impressions retreat.  My trial cut of this border die happened to be a nice green from my scraps tray ......


...... and I realised it was the perfect addition to this card!
The daisy was stamped and punched three times, coloured with three SU pink pens, and layered up, with the centre coloured yellow.  I used the same pens to 'ink' up the texture stamp and sentiment, then cut out the stamped image, and die-cut a banner.
I like the layout of this card, think I will try it with an embossed panel in place of the texture stamp next time.

Saturday 9 September 2017

Out of the Drawer: Snowflake Christmas cards

This Stampendous stamp set and matching dies came out a couple of years ago, I saw it and thought well that's OK, but I won't bother with it.  Fast forward a few months and I see a card on Pinterest and decide that actually I would rather like the sets after all!  But you know how fast everything is released and then disappears nowadays...... I couldn't find it anywhere.  In the end I got the stamps from a UK company and the dies from the US, via Amazon.
So what happened next ....?  Yes you guessed it, they went into the drawer and have never been christened, even though I went to such lengths to get them!!
Tine to put that right:-)


There are two small and one large snowflakes in the set and I used the smaller ones, in two colourways.  However I found that one of them was more difficult to die-cut as the die obscured most of the stamping and it was very difficult to position accurately.  The gold snowflake on the right was my third attempt, I then switched to the other one which is much easier to cut!
For the blue cards, I stamped/embossed the snowflakes in silver and blue, plus a sentiment (Stampin' Up).  The paper is from Craft Creations, matted onto silver mirri.
The gold snowflakes and sentiment are also heat embossed and the paper is from Teresa Collins, matted onto a nice dull gold.
I made five gold and six blue - it would have been six gold but I messed up the stamping of the sixth snowflake and I was a bit fed up with them all by that point LOL.  I also discovered that my 4" card blanks were actually not square, so I had to trim all my carefully cut mats to fit!  I have since cut down the entire pack so that they are all square, otherwise I can't use any square dies without them looking wrong! Thank you, Card Crafts UK ......
I ma very pleased with how they have turned out, that's eleven more for the box :-)


Sunday 3 September 2017

Sheltering Tree birthday card

We have finally got my PC back together and working again (fingers crossed, it's for real this time!!)  I have had to get all my photos etc off the old hard drive, re-install all the photo processing software, reset all my internet stuff.... nightmare.
I have been making a few cards in the meantime, though :-)  This is Krafty Karen's birthday card.


I have used the SU Sheltering tree stamp set and a sentiment from Stamping all Day.  The grass is two impressions from the same stamp, without re-inking, over a masked-off tree trunk.

Monday 19 June 2017

Christmas screen cards

I have been playing around with border punches to make some more screen cards - the original post with instructions is here.  They are very difficult to photograph so the full effect can be seen, but these are my best attempts!


The paper is from Craft Creations, the snowflake dies are Memory Box and the border punch is Martha Stewart.  The border didn't have a neat 'end' so I cut to a pleasing shape :-)

Wednesday 31 May 2017

Pinspired - Stable Door birthday card

There's probably a more correct name for this - but to me it's a stable door!  The original Pin is here.


Quite tricky to photograph so the full effect can be seen!
I cut an A4 piece of cardstock in half lengthwise, scored at the centre and then carefully cut the top half of the card front off.  Then I used some paper from a 6" pad for the inside and the front, being careful to line up the design so both panels matched.
The flowers are from SU, stamped and punched out.  The card actually sat in my 'to be finished' box for a while, because I couldn't find a stamp which felt right for the sentiment.  Obviously I don't have enough sentiments, after 24 years of stamping....... Hah!!!  Then I was having a bit of a sort out and came across this Woodware one, there are two big stamps in the set and this one looked best. It's now permanently in the stamp bags which comes to every crop with me - can't believe I had forgotten about it!
I really like this, it's a little different and I think it could be adapted quite easily to masculine cards - I'm sure I have just a few cogs and gears stamps just lying around...... LOL.

Monday 29 May 2017

The same, yet different .....

For these two cards, I used the same stamp, the same inks and the same colour mat.  The difference is that one is stamped on white card and the other on ivory :-)


The image is from Woodware, called 'going to seed', I believe.  It's one of my new favourites!  The background spatters are a Seth Apton stamp and the sentiment is from Stamping all Day.

I'm not sure which version I like best - they both look very effective.

Saturday 27 May 2017

Christmas cards, first batch!

Yes, it's the dreaded C-word...... the first batch made this year, I think.


I made four of these, from one sheet of 12 x 12 paper (Bo Bunny).  I didn't want to clutter up the beautiful background, so kept it very simple with a sentiment tag, stamp is from Stamping all Day.

I like this way of using a busy background, so now I need to dig into my Christmas paper stash to see what other similar papers I have :-)

Saturday 20 May 2017

Distress Oxide birthday cards

I have finally caught up with photographing everything I have made over the last few weeks :-)  These cards are done with Distress Oxide backgrounds.


I used foam blending pads to apply the inks through a stencil, definitely gives a better effect than using a stencil brush.  Then I ran into my normal problem with creating backgrounds - I didn't want to cover it up!!  So I went with a simple die-cut sentiment, but that didn't really stand out from the background.  In the end I matted onto the same colour cardstock as the die-cut and cut a stitched circle as a base for it.  I am really pleased with the effect :-)


The second card is a blended background, over-stamped with a Woodware seedhead stamp in black.  Then I cut into three panels, matted onto black and punched out a sentiment strip.  I am not entirely happy with this one - I think the black mat is a bit harsh and maybe I should have used the same blue as the other card!!!  But it's OK :-)
More experimentation to come!

Friday 21 April 2017

Out of the Drawer: lattice stencil flower birthday card

Still haven't managed to photograph any retreat stuff....  we had visitors over Easter so no crafting!  Good time had by all :-)
I did manage to finish another Distress oxide stencilled image into a card though.


The OotD item is the lattice die, from Tonic. It's not a complete lattice, the centre is a blank circle, which actually, I didn't like when I originally tried it and so haven't used it since.  Then it occurred to me that I could cover it up ...... duh.  So I die cut the stencilled flower (Clarity stencil) into the outer square shape, then trimmed it into a diagonal sash to cover the centre.  I'm not quite happy with the finish on the stencilling, I used a proper stencil brush, but blending foam pads would have worked better - for the next background I made (not completed into a card yet), I tried those and the colours are much more dense and chalky.
Some aqua/silver paper for the background, also cut with the outer square, then everything was layered up.  All it needed then was the sentiment, I used an SU punch and a peel-off.
I do like the die used in this way and will definitely try it again :-)

Monday 17 April 2017

Out of the Drawer: Double gatefold birthday card

I forgot I hadn't blogged this, it's Sy's birthday card!


I made a double gatefold card blank and used papers from a 6" pad to make the panels.  The medallions are made with an SU set, Daydream Medallions, heat embossed in purple and teal, then die-cut with a pierced circle.  The sentiment banner is also a pierced die, SU sentiment heat embossed again with the purple.
The paper, stamps and the embossing powders are all OotD items - I really must use my embossing powders more often, I have so many (whisper it, around 90......) and I do like the effect.  I think that because I do most of my crafting at crops or retreats, I don't tend to take a heat gun etc with me, so that's probably why they have fallen by the wayside.  Must do better!!

Thursday 13 April 2017

Buy it - Try it: Distress Oxides and stencil birthday card

I have just come back from another amazing retreat at ATDML, but haven't managed to photograph anything I made yet!  The previous weekend was my monthly craft weekend, although the crop itself was cancelled, myself and Sy had a great couple of days crafting at the dining table :-)
I tried out some of the new Distress Oxide inks, made some backgrounds and played about with stencils I have just bought from Clarity Stamps.  One of the resulting images has made it onto a card, the rest will eventually, I'm sure....


The DiOx have a dense chalky finish when blended, lovely to stamp over, I used Cracked Pistachio, Broken China and Faded Jeans.  Then I over-stamped with another new purchase, a seedhead stamp from Woodware and some obligatory hide-the-ink-smudge butterflies :-)  The sentiment is from Visible Image.

Monday 3 April 2017

Sympathy card

I have made sympathy cards before, but I do find them hard to make, in fact they are the only card I will go out and buy from a shop.  So I thought I had better try my hand at one.


The poppy die is from Memory Box, cut in both a lavender-lilac colour and black.  The sentiment tag is from MFT, I think, also cut in the two colours.  I used a Bazzill Swiss Dot cardstock for the background and matted it onto silver mirri.
The lavender die-cuts are offset onto the black for a shadow effect.

Friday 31 March 2017

March yellow challenge

Over at Kool Kitty, the 2017 Pantone colour challenge for this month is yellow.  Not really one of my go-to colours, but I got onto a bit of a roll and have made four!  Well, I wasn't happy with the first one, so I did a second one which gave me the idea for the third, which led to a fourth using the leftover bit ...... you know how it goes :-)


Memory Box Butterflies, Tattered Lace flourish and SU sentiment.  The background paper is from Craft Creations, the butterfly bases are a bronze pearlescent cardstock, doesn't show well in the photo :-)


More MB butterflies .... I had this white die-cut leftover from the pink inlaid card I did the other day, so just popped it over the same yellow paper matted onto matching Bazzill.


Then it occurred to me that I could do another inlaid card over the yellow paper, so that was the third one.  But then I had another white die-cut leftover ...... so .....


I had this background already embossed and smooshed over with Distress ink, it does have yellow in the mix ....

That's four cards from a colour I don't really use very much.  Not bad :-)

Wednesday 29 March 2017

Buy it - Try it: Steampunk birthday card

I bought two Sheena Douglas dies earlier in the month and thought the clock would be perfect for a crafty friend's birthday card.  Yes it's the same card, photos taken in two different lights!!


The background is embossed in a swirly folder, then coloured with Distress stains (another BiTi) in black, pewter and bronze.
I attached the die-cut, but it needed something more  ....... the die hadn't quite cleanly cut in one place and I decided to put a butterfly over it - in fact this card was going to be called Butterfly at 7 o'clock LOL.  But it looked a bit lonely, so I added two more!!  The die set is from Memory Box.
Originally I had planned to put a sentiment banner under the clock, but I had also tried out the SD balloon die when cutting the clock and I though the 'undercarriage' part would go very well under the clock! 
So this one evolved a bit in the making, but I am very pleased with it :-)

Thursday 23 March 2017

Inlaid Pink Butterfly birthday card

This card started as a failed background!  I had smooshed some card with distress inks, spattered some water over and blotted off, then over stamped with some grungy spatters.  But I didn't like the end result and put it to one side.  Then I saw an idea in a magazine (not sure which one) about some new cover up dies from Memory Box, which have a negative image cut result and the magazine had placed these over patterned or inked backgrounds.  This made me wonder about using my own dies in a similar way and I chose this Memory Box butterfly.


The layers are, from base up: card blank, burgundy cardstock mat (which needs to be wider but I'm going with it!), splotchy background, white cardstock with negative die cut - I kept all the bits of this as some would need to be slotted back in.  Then the same die used on pink cardstock fits into the negative space and the three pieces between the leaves/stems and the butterflies are stuck back in.  I cut separate antennae from another MB butterfly set, in the same burgundy as the mat.
If I had planned a bit more as to where I was going with this, I would have used Stick It sheet adhesive on the pink die cut and white top piece - it was a bit fiddly doing it with Herma!!
I really like this inlaid effect, must try it with more of my dies.  After I have ordered some more Stick It ...... LOL.

Monday 20 March 2017

Wedding Anniversary card

Our 32nd wedding anniversary was last Thursday.  We went off to Oxford for a couple of days to celebrate, had a nice time wandering around Blenheim Palace and its gardens.  We had meant to visit a couple of museums on the following day, but I had wrecked my feet going round the gardens, so we'll have to leave that for another time.  The hotel was nice, but the room didn't have glasses in, just those plastic tumblers which would tip over if you poured something from a bottle into them... so we drank our Prosecco by the mug instead!!  And very nice it was too :-)
This is the anniversary card I made for DH.


As usual, mirri and photography are not the best of friends.... It is very shiny in real life!!  I embossed some Bazzill Diamond Bling cardstock for the background and matted it onto silver mirri.  Then I die-cut the heart (Robert Addams) and sentiment (Tonic) from the same mirri.
Simple but effective, as they say :-)

Wednesday 15 March 2017

Rose birthday card

I made several cards with Chocolate Baroque rose stamps a little while ago, but forgot I hadn't blogged this Mesh Rose one!


I stamped in Memento and coloured with Copics.  Then trimmed to size, added the sentiment (Stamping all Day) and simply matted onto a card blank. 
It did take me a few attempts to get a complete impression, I must admit.  But I have now invested in a stamp mat, which should help with the more stubborn stamps in my collection, so must try this one again!

Monday 13 March 2017

Buy it - Try it: Tie dye thank you card

I recently bought the new Tie dyed stamp set from SU. 


After a little play with the three different spiral motifs, I stamped them in three colours, six times, then matted the images in two each of the same three different colours and put them onto 3" card blanks.  Only three shown in the photo!  A nice little set of six thank you cards :-)

Thursday 9 March 2017

Monochrome in Aqua

I was having a play around making an inky background .... didn't have much thought beyond wanting to use a stencil as part of that background.  This is the result:


I made a smooshy distress ink base and stencilled the dots.  Then I stamped the butterfly (SU) and masked before stamping the script (Darkroom Door?).  The swirl (Hero Arts) and tiny butterflies (Daliart) were next, then a sentiment (HobbyArt).
Sometimes it's just nice to play :-)

Monday 6 March 2017

Buy it - Try it: Vertical Greetings stamp set

Another couple of cards made by using water colour markers to colour the stamp instead of ink.  The stamps set is from SU - Vertical Greetings.


I was very pleased with the three identical panels on this one, until I realised that I had left no room for a sentiment!!!  So I improvised with a tiny stamp, punched out into a small scalloped circle.


Second attempt - I used the vertical sentiment from the set on the centre panel and I like the overall effect much better :-) 

Saturday 4 March 2017

Out of the Drawer - daisy stem birthday card

I have had this Stampendous stamp for a while now, but it was still unchristened .... so I decided to combine it with a technique I have been re-visiting lately, colouring stamps with watercolour markers and then stamping the image.  This is something I used to do years ago, but had forgotten about it until a demo at the Chailey workshop with Nicky (contact nickyalevy@btinternet.com ).  So I have invested in a combination of SU and Distress water based markers, pulled out my old Marvys and thrown out the really dried up ones (!) and kept the rest!


The stamp has bees above the stems, but I chose not to stamp those and did the butterflies separately.  I also decided not to colour in the daisies as I like the outline effect :-)  The sentiment stamp is from Visible Image.
A nice simple card which didn't take too long to do :-)

Wednesday 1 March 2017

Pin-spired Wednesday - Screen card

I have been meaning to try this style of card for ages, then someone at the Chailey workshop (contact nickyalevy@btinternet.com ) had a decoupage kit with a ready cut screen card in it, so I just had to make one myself :-)  I have a few of these Pinned, one example is here.  The effect can be varied with your choice of border punch and the whole card folds up to fit in a standard 6 x 4 envelope.


I had previously made a couple of blanks as practice, but not decorated them.  The paper is from an Authentique 6" paper pad which I had in my tote, and the flowers are SU punches, as is the bracket punch used to make the 'legs'.  The border is a Fiskars punch.
Now there is a standard way to make these, but I have customised mine :-)  The standard method is to cut a strip 11" x 6", border punch along one edge, then score at 2.75 inches, then at 5.5 and 8.25.  Use the bracket punch at the base of each panel, but line up the card inside it so it only punches half of itself.
But .... I like the pattern repeats of the border to 'line up' with the scoring .... not that I'm obsessive or anything .... LOL.  So I customised it.  I cut a 12 x 12" cardstock sheet into two 12 x 6" strips.  Use the border punch as before.  Then count the pattern repeats - there were 29 open scallops on the card above, the nearest number divisible by 4 is 28.  So I cut off one scallop and scored a line every 7 scallops.
Really pleased with this - I will photograph the next one step by step for a tutorial, but I think I need to try out a few different borders first :-)

Sunday 26 February 2017

Colour Challenge 2017

Flame is the challenge colour this month over at Mystik Nat.  It's orange veering a little towards red, not normally a natural choice for me, but I did enjoy doing these.


It's the same Chocolate Baroque stamp as I used for the Valentine card, but in two different shades of orange.  The first one is stamped and matted onto a light brown cardstock and the second onto cream, both mats were embossed with a swiss dot folder.  The sentiment is done with a SU stamp and punch.

Friday 24 February 2017

Engagement card ... no pressure...

Last week, DH and I were exchanging emails at work and he said how much he liked the Valentine card I made him.  So, talking of cards, he said, K has got engaged, do we have an engagement card in the box???
Well.  Of all the cards there are in the box, what is the one thing I do not have..... :-)
I now have several such cards Pinned!  But in the end, the idea came to me at work the following day, so I had to do a quick sketch in my planner to make sure I didn't forget it before getting home LOL.  Never have I clock-watched so assiduously and I was out of the door like a rocket!!  When DH got home and saw me working, he knew he was doing dinner ..... :-)


Photographing mirri is always a nightmare, in the end I had to lie the card flat which has foreshortened the view a little, but every other way I tried was just a mess of reflections!
Another outing for the Tonic Celtic layering die set using mirri, white and a lilac Swiss Dot cardstock.  The sentiment is from SU and is stamped/embossed in silver, then die-cut with a pierced banner die.  The hearts are the same die, from Robert Addams, one cut with the mesh inner piece and one without.
I am very pleased with this one, once I had the idea, it came together very quickly.  I would like to know if these shaped card blanks are available anywhere now though - I can't remember how long ago I bought them, or even what brand they are, but they are perfect for big circular designs like this.  I probably ought to experiment with some dies to see if I can get a similar effect myself, any suggestions welcome :-)

Wednesday 22 February 2017

Buy it - Try it: Gleam not Glitter

As everyone knows, I Don't Do Glitter :-)  But I don't mind a bit of gleam from time to time, so when we were talking at the retreat and discussing the Wink of Stella brush pens, I took the plunge and bought one from the lovely Katie of Cre8tive Online who was there with her shop.
I had previously stamped and coloured an image, so decided to try out my new pen.


Unfortunately it doesn't really show well in the photo, but I assure you it is very gleamy LOL.  The frame and the larger flower stamps are from Stamps by Chloe, coloured in various shades of blue, I applied the Stella just to the main flowers, not the teeny ones.
The circles are done with Tonic Celtic layering die set, the outer ring was cut separately out of white (because I couldn't find a Bazzill match!) and coloured with the same blue pen as the flowers, which works really well and I'll do that again :-)
So, what can I 'stella' next?